Pixel Art Grid Maker
Make a pixel art grid from a photo or illustration, then refine each cell before exporting. Build grid pixel art with adjustable dimensions and colors; your image stays in your browser.
Your pixel art starts here
Choose a photo or illustration. We’ll create an editable pixel version automatically.
Your image stays in this browser and is never uploaded.Or start with a sample
Choose a tool, then click or drag across the grid. Undo and redo shortcuts: Ctrl/Cmd+Z and Ctrl/Cmd+Shift+Z.
Export settings
Choose a pixel project to try
Browse twelve clear photos of everyday objects and foods, converted into pixel art. Choose one to load its source photo in the editor.
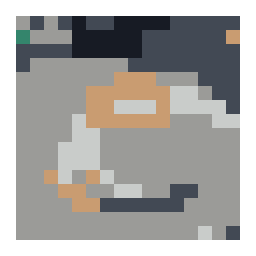
Cappuccino at a café
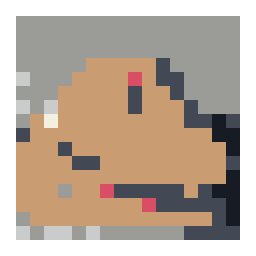
Fresh sourdough boule
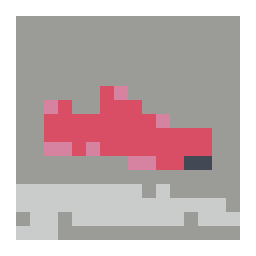
Red running sneaker
Yellow umbrella on a rainy street
Glass perfume bottle
Cheeseburger on a plate
Tortoiseshell sunglasses
Vintage film camera
Watermelon slice
Fresh garden carrots
Acoustic guitar by a brick wall
These starter designs are illustrative, not customer work. Choose one to load it in the editor, then adjust the grid and colors for your project.
Features
Explore what this workspace can do, how each control affects the result, and which export fits your next step.
Turn a picture into a cell-by-cell grid
Choose a PNG, JPG, or WebP image to create an editable grid in your browser. The grid follows the image proportions, so a portrait stays portrait and a landscape stays landscape instead of being forced into a square.
Choose the amount of detail
Set the number of cells across the image. A smaller grid combines nearby details into broad shapes; a larger grid gives edges, facial features, lettering, and small objects more room to appear.
Reduce and shape the colors
Set a maximum color count and choose from the available palettes. Optional dithering distributes nearby colors in a pattern to suggest a gradient; turn it off when you want flatter, cleaner blocks.
Correct individual cells
Paint, erase, fill an area, or pick a color already used in the grid. Undo and redo let you compare edits during the current session, so you can clean a silhouette without converting the source again.
Remove a flat background or use transparency
Background removal can help separate a clear subject from a simple backdrop. You can also choose a transparent PNG background for layered artwork; inspect the edges before using the result on a different canvas.
Export artwork or a working chart
Save a clean PNG for the pixel artwork, a pattern PNG with grid lines and optional cell labels, or a printable PDF with a grid and color key. Large print layouts can continue across multiple pages.
Work with a local image
Image conversion takes place in the browser. The tool does not upload the source image, and the current editor does not keep a project account or restore the work after the page session ends.
How to make a pixel art grid from an image
Build the grid in a few deliberate passes: choose a source, find a useful level of detail, correct the cells that matter, and export the format that fits your project.
Choose a useful source image
Select or drop a PNG, JPG, or WebP file, or start with one of the twelve built-in examples. A clearly separated subject and readable outline usually survive a small grid better than a busy photograph with several competing focal points.
Set the grid before polishing
Start with a medium grid width, then compare a coarser and finer version. Decide whether the silhouette, a face, a logo shape, or a small prop needs the extra cells before you settle on the final dimensions.
Tune colors and edit the result
Try a lower color limit for a simpler palette, then compare dithering on and off. Use Paint, Erase, Fill, and Pick for local corrections; undo an edit when it makes a neighboring shape harder to read.
Choose the export for its destination
Download a clean PNG for display, a pattern PNG when visible cells help you follow the design, or a PDF when you want a printed chart and color key. Check transparency, labels, and page scale before using the file elsewhere.
What a pixel art grid represents
A pixel grid describes an image as rows and columns of colored cells. The converter samples the source image, assigns a color to each cell, and displays the result as a block-based version that can be edited. Each square is a position in the design; it is not automatically a physical bead, stitch, brick, or Minecraft block unless you use a tool built for that material.
The grid is useful because it makes detail measurable. Instead of asking only whether an image looks pixelated, you can decide how many cells define its silhouette, how many colors are available, and whether each cell should remain a clean solid block.
- Grid width controls the number of columns; the image height follows the source proportions.
- Color count limits the palette used to approximate the source.
- Cell edits let you correct the generated result without redrawing the whole image.
Choose an image that can survive simplification
A good source has one main subject, enough contrast to distinguish its outline, and a background that does not compete with it. A close crop of an object often gives the converter more useful pixels to work with than a wide scene where the subject occupies only a small part of the frame. Simple illustrations and logos can also work when their outlines and color regions are distinct.
A detailed photograph may still be a useful starting point, but small textures and subtle color changes will be grouped or removed as the grid gets smaller. If the result loses the feature that makes the subject recognizable, try a larger grid, simplify the source before loading it, or use cell edits to restore the essential shape.
Balance grid width with the image proportions
Grid width is the number of cells from the left edge to the right edge. Fewer columns mean each cell covers more of the source and creates larger visible blocks. More columns preserve narrow edges and small features, but they also create a busier grid that may be harder to follow when printed or recreated by hand.
The height is calculated from the source image proportions. A square source remains close to square, while a wide or tall source keeps its shape. For a design intended for a physical project, decide the desired width first and review the resulting height before you count materials or choose a print size.
Use color reduction and dithering intentionally
A maximum color count sets how many different colors the converter may use. Fewer colors can make the result easier to read and reproduce, while more colors can preserve additional shading. The best setting depends on the subject and destination: a simple icon may need only a few clear tones, while a shaded object may rely on more colors to keep its volume.
Dithering places neighboring palette colors in a pattern to approximate a color between them. It can make a gradient feel less abrupt, but it adds texture and more visual variation to neighboring cells. Compare the preview with dithering off and with the available algorithms; keep the version whose shapes are easiest to recognize at the size where you will use it.
Edit only the cells that change the reading
Generated grids are a starting point. A single misplaced cell can interrupt an outline, merge two shapes, or make a small feature disappear. Paint a cell when you need a precise color correction; use Fill for a connected area; pick a color from the existing grid when you want consistency; and erase a cell when the pattern should have an empty position.
Review the design at both its working size and the size at which it will be viewed. A zoomed-in grid makes it easier to place cells, while a full-image preview reveals whether the overall silhouette still reads. Undo and redo are available while you work, but save useful exports before leaving the page because projects are not stored for a later session.
Pick an export that matches the next task
A clean PNG is suited to sharing or placing the pixel artwork in another design because it omits the chart markings. The pattern PNG can include visible grid lines and optional cell labels, which help when you need to locate a specific row and column. If transparency is enabled, inspect the exported edges against the background where the artwork will appear.
A printable PDF includes a grid and color key for following the design away from the editor. Print scale and paper layout affect how large the cells appear on paper; large grids may span multiple pages. Treat the PDF as a reference and check that the labels and key are readable before beginning a long craft or build.
Know what happens to your image and edits
The image is processed locally in the browser rather than sent to the converter. This describes how the current tool handles conversion; it does not mean the page saves your project automatically. The editor does not provide an account-backed library or a way to reopen an unfinished grid after the session ends.
Download the version you want to keep before refreshing or closing the tab. If the source is private or sensitive, you can also check your browser extensions and device environment, which are outside the editor’s control. For very large images, resizing a copy before loading it can make the editing process easier on the device.
Pixel grid maker questions
How do I make a pixel art grid from an image?
Choose a PNG, JPG, or WebP image or load a sample. Adjust the grid width and color treatment until the silhouette is readable, then use the cell tools for corrections. Download a clean PNG for artwork, a pattern PNG for a labeled grid, or a PDF for printing.
What grid width should I use?
There is no single width for every image. Start with a medium setting, compare a coarser and finer grid, and keep the smallest version that still preserves the details that matter. The grid height follows the source image proportions.
Can I change individual pixels after conversion?
Yes. Paint, erase, fill connected areas, or pick a color from the grid. Undo and redo are available during the current editing session, so you can correct a shape and compare it with the prior version.
How do I export a printable pixel grid?
Choose the PDF export for a printable grid and color key. The pattern PNG is useful when you want grid lines and optional cell labels in an image file. Check page scale and label readability in the export before following a large chart.
Can I make pixel art with a transparent background?
Yes. The editor can export a transparent PNG background. Use background removal when the source has a clear, simple backdrop, then inspect the subject edges because complex backgrounds can leave unwanted pixels.
What is dithering, and should I use it?
Dithering uses a pattern of nearby palette colors to suggest shades that are not directly available. It can soften a gradient, but it also adds texture. Compare the preview with dithering off and on, and choose the version whose shapes are clearest for your use.
Does PixelGridMaker save or upload my image?
The current editor processes the selected image in your browser and does not upload it to the converter. It does not save projects to an account or restore them after you leave the page, so download work you want to keep.
How can I convert a logo to pixel art?
Use a high-contrast logo image with a clear outline and as little surrounding space as possible. Start with a low color limit, then increase the grid width only if lettering or narrow shapes need more cells. Check small text carefully because pixel grids can make it unreadable.
Can I use the grid for cross stitch or beads?
The general pixel grid is a digital design reference, not a material-specific chart. For thread symbols and Aida sizing, use the Cross Stitch Pattern Maker; for bead brands and board layouts, use the Perler Bead Pattern Maker.
Which image file types can I use?
The editor accepts PNG, JPG, and WebP images. If a file does not load, try exporting a copy in one of those formats and reduce its dimensions if it is unusually large.